Cut it with VCarve
The calculator does the math; the gadget turns it into cuts. Moving your design over is copy and paste.
How the flute is cut
The flute is split down the middle from end to end, into a left half and a right half. Each half lies flat on the CNC with the face you'll glue facing up, so the CNC is cutting a side view. That means the ramp, the flue and the beveled splitting edge are cut exactly at the angles in your design, and each finger hole is a half-round groove in each half.
- Install the gadget once, from the gadget page.
- Copy the code. At the bottom of the calculator, click Copy code for VCarve.
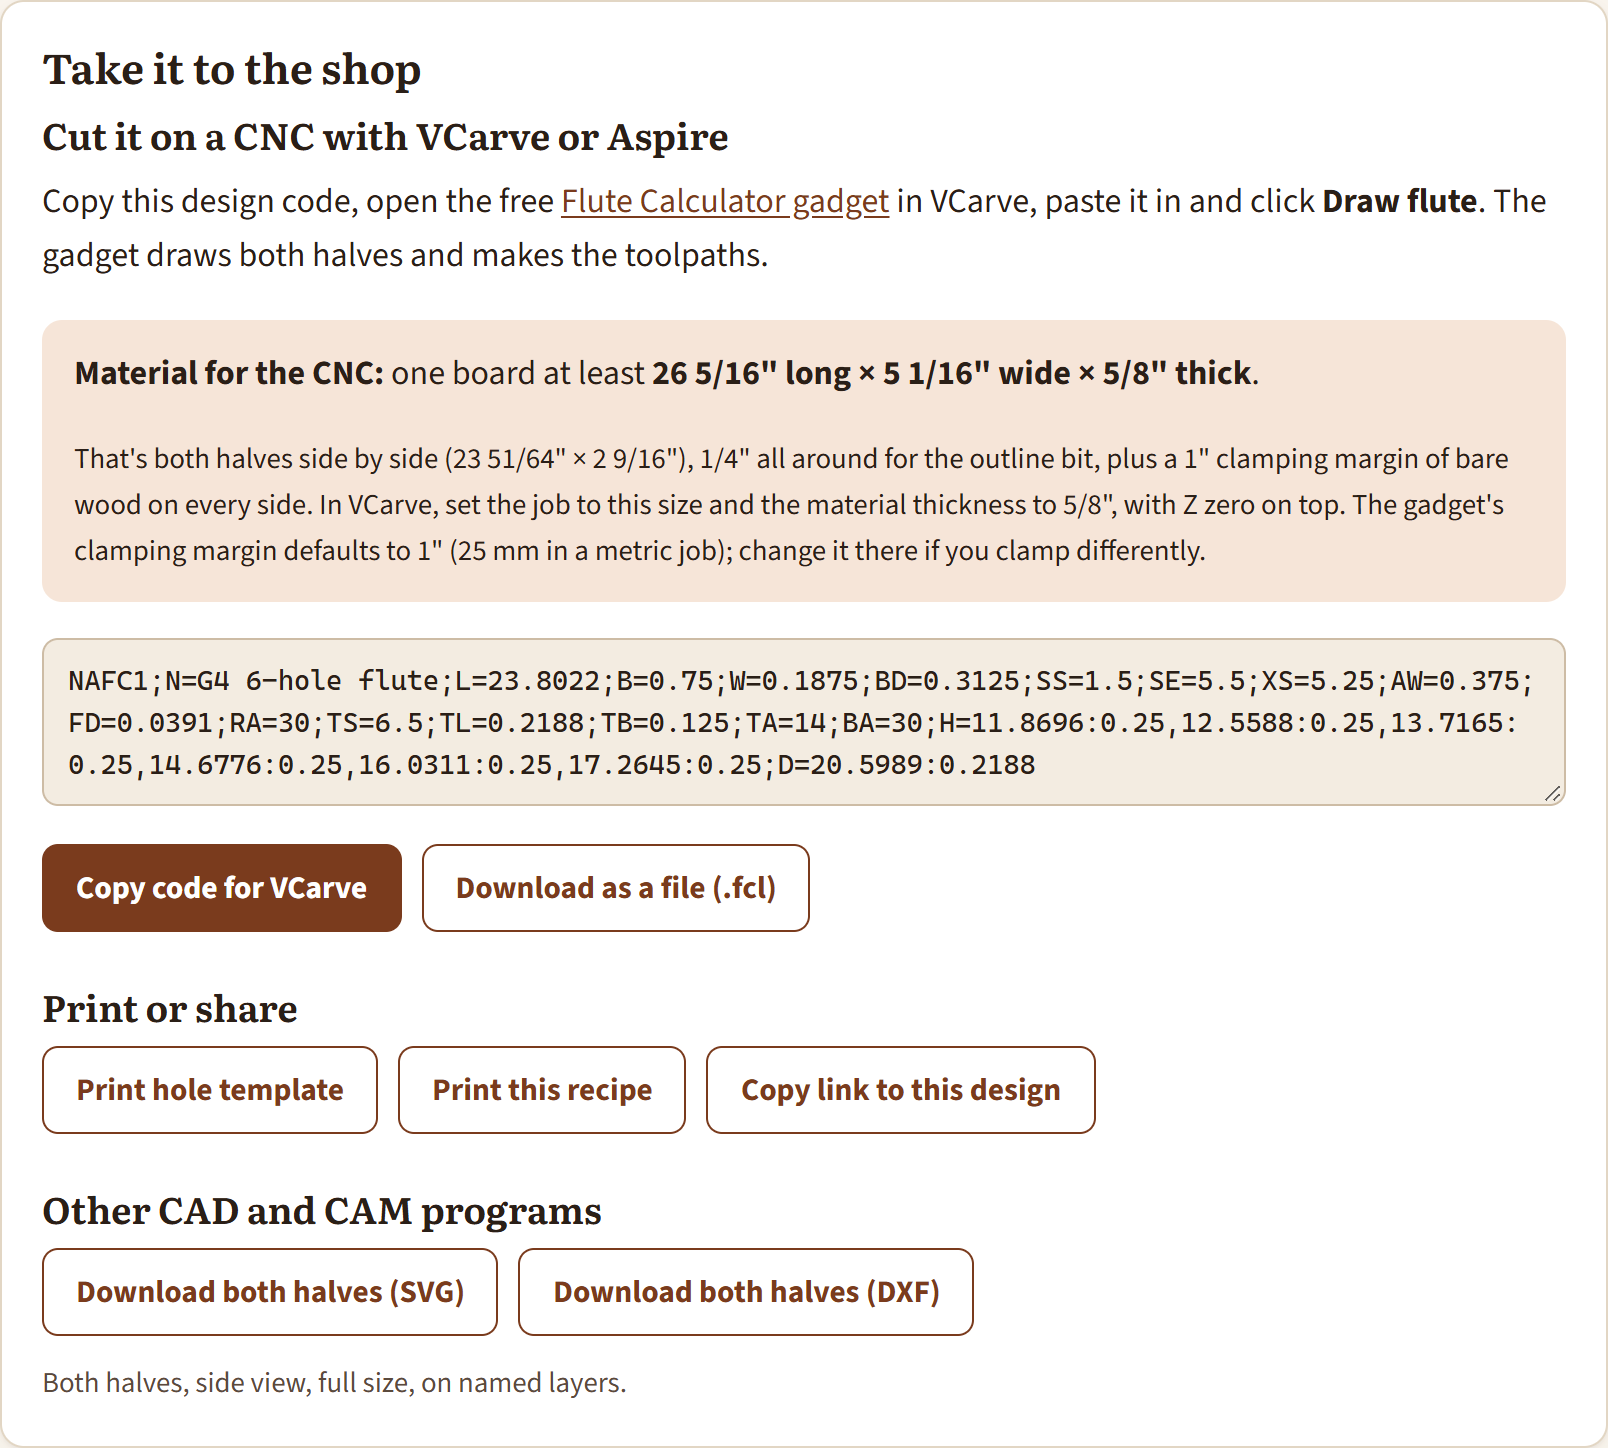
- Make a job the size of the board in the calculator's Take it to the shop card. It already includes a 1" clamping margin on every side. Set the material thickness to the thickness shown there, with Z zero on top.
- Run the gadget from the Gadgets menu, paste the code into the box and click Check code to see the design. Change any bit to one you own.
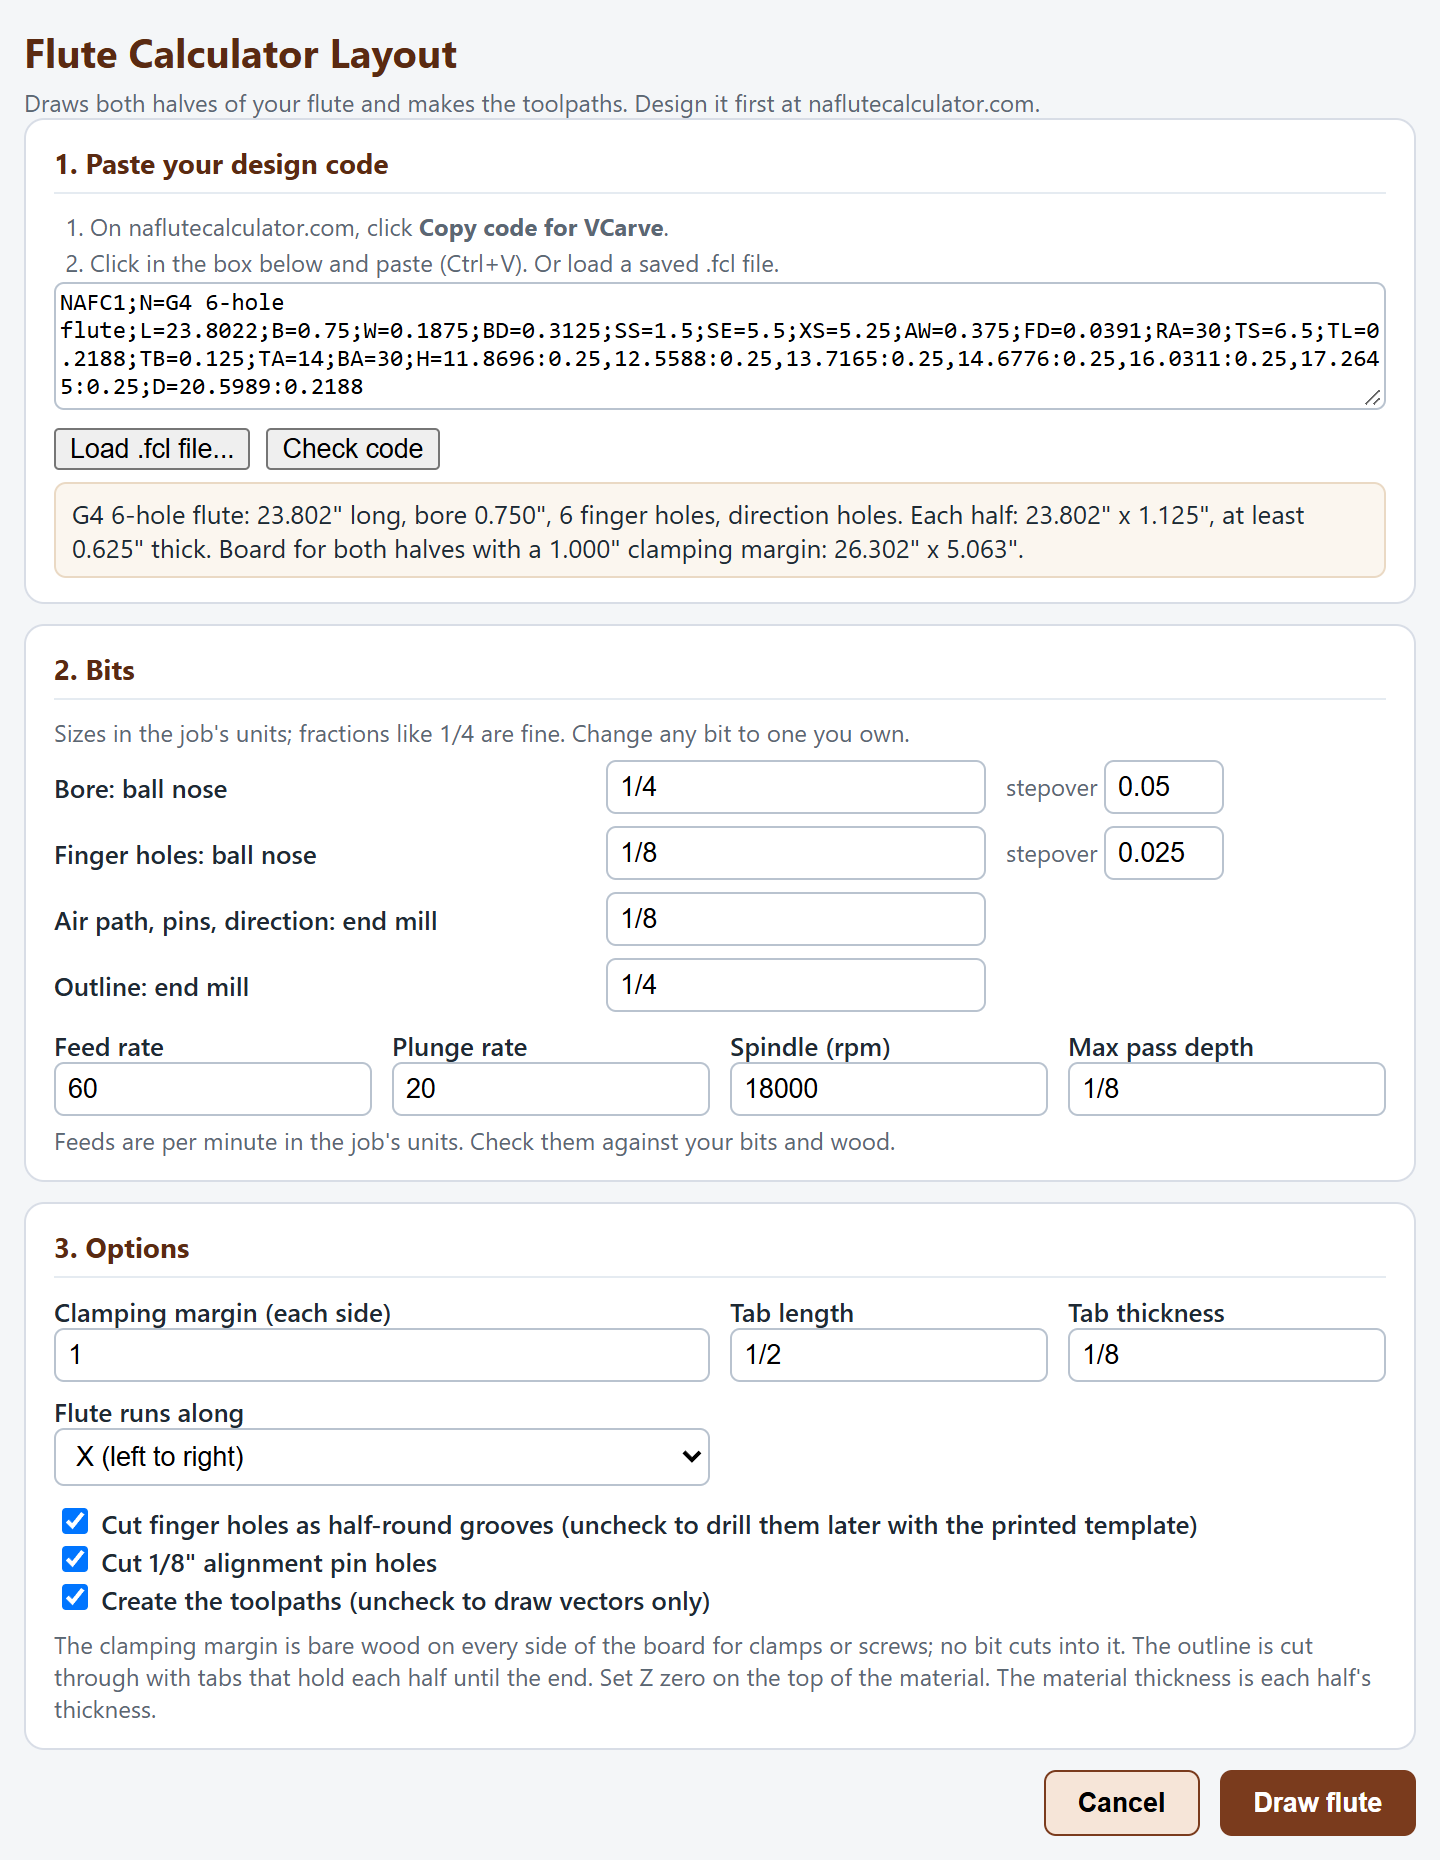
- Click Draw flute. Both halves appear on layers starting with "Flute", with toolpaths for the bore, breath hole, finger holes, pins, air path (exit hole, flue and sound hole), direction holes and, last, the outline with tabs. Preview, then save the toolpaths.
- Cut both halves. The tabs hold them in the board to the end. Cut through the tabs, sand the stubs flush, and sand the glue faces lightly.
Glue-up
- Put 1/8" pins in the alignment holes.
- Wrap a dowel the size of the bore in plastic and lay it in the bore. It keeps the halves lined up exactly, and with them the half-round holes.
- Glue sparingly, away from the bore, the air path and the holes. Clamp, then pull the dowel before the glue sets hard.
- Round the outside, leaving the top flat where the block sits and around the sound hole.
Open each finger hole up to tune it, as in the next lesson. If you'd rather drill the holes, uncheck "Cut finger holes" in the gadget and use the printed template.